3 things
to check for better motion detection
Written by Joe Janson,
Project lead at Omega Unfold Inc
Written by Joe Janson,
Project lead at Omega Unfold Inc
|
Many things can go wrong during a motion detection process, resulting in misses and false positives. Because conditions change throughout the day, you need to optimize the setup in order to get reliable results. Here are the things to watch out for.  Get the right
camera for the job Get the right
camera for the jobThere is no substitute for good video source, there is no such thing as a software "enhance" feature that takes a crappy image and cleans it up. The resolution of the camera refers to the amount of pixels in an image. This can be represented as a width/height measure (640x480), a mega-pixel value (640x480 = 0.3 mega pixel), or number of lines in the case of analog cameras. A good image resolution is useful when you want to record images or video, but it has little impact on the quality of motion detection. The price of the camera is usually the better clue for the camera's quality; remember that a cheap camera can have a high resolution, but this does not mean that it will provide great colors and decent frame rate, nor that it will perform well under low light conditions.
Many webcam do not have adjustable lens, have a simple lens that you need adjust manually to set the focus. A few high end webcams have auto-focus mechanical lens, which provide better images, but at a cost: if something moves out of focus, the camera will try to re-focus, which may trig the motion detection.  Lighting is
everything Lighting is
everythingAgain, there is no substitute for a good source image. Webcam behavior changes with lighting: When the scene goes darker, the camera compensates by increasing the voltage in the video sensor, making it more sensitive. The downside is that this voltage increase produces noise in the sensor, resulting in grainy images (see picture below for example). If a camera measures 1% noise from a well light room, the same camera may well measure 3% noise from the same dim light room. Another camera may behave differently. This lack of stability in light reading is a problem because it makes it harder to adjust the motion sensitivity.  Darker scenes produce noisy images. A darker scene also means that camera may spend more exposition time for each frame, resulting in a lower frame rate acquisition. On the other side, it is possible to provide too much light, this can sometime happen for cameras looking outdoors. In this case, the image, or part of the image, will saturate to white, making it impossible to see anything.
Here are a few important points that you should consider when setting up motion detection:
 Place motion
detection Hot Spots strategically Place motion
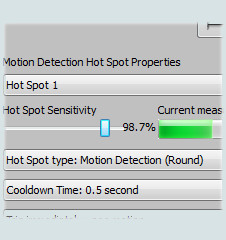
detection Hot Spots strategically This is where the Webcam Zone Trigger software gives you a huge advantage over standard motion detection software. You get to choose the size and position of the area to monitor by placing a motion detection Hot Spot object on the image. How to Use motion detection Hot Spots 
More tips to get better results with Hot Spots:
|
||
References http://www.zonetrigger.com - Motion Detection software download site Download a free copy of the Zone Trigger software. If you have questions about the Zone Trigger products or if you require consultation and advice on your computer vision projects, please contact Omega Unfold's technical support: support@zonetrigger.com |

More articles...
Introduction to motion detection and video capture
How to setup a home HTTP server
3 things to check for better motion detection
Interactive Digital Signage How-To
Troubleshooting Webcams
Using Zone Trigger software with the microsoft Kinect
USB bandwidth and connection issues
High-framerate webcams (60-120fps+)

